Connect your Mac to the dock to
- Charge your Mac and phone
- Use a second larger display
- Attach USB drives, camera cards and more
Plug your Mac into the back of the Kensington dock (pictured below) using the attached Thunderbolt cable. The dock will then charge your computer and let you use a second display and additional ports for plugging camera cards, USB drives, headphones and more.
- Only one port is compatible with your laptop and it's found at the back of the dock. It requires a Thunderbolt 3 or 4 cable, not a USB-C cable although they all look the same.
- The two high speed USB ports in the front can fast-charge your phone or work with other USB devices (up to 10Gb). There are more USB3 (5Gb) ports at the back.
- Please do not detach or remove the three cables that are pre-attached to the dock
- Check how to get the most out of a multi display setup
- The network port is not normally in use
- If you are using macOS Ventura you will see a warning message the first time you plug the cable to your Mac. This is normal. Press Allow to activate the dock and external display.
If you are having problems with the dock station check the following
- Make sure the power plug is inserted securely to the back of the dock
-
Check these 3 cables are connected to the correct ports on the back of the dock station:
- Laptop to dock station
- Dock to monitor (DP or HDMI)
- Dock power
- Check that the monitor is plugged in to power and switched on
- If you are using macOS 13 (Ventura) you also need to authorise the device by pressing Allow at the prompt
- Sometimes resetting the dock can help. Simply pull out the power plug at the back for 3 seconds and plug it back in (see pic below)
Please let us know at itsupport@minutemedia.com if your computer doesn't have a USB-C port which is required to connect, this applies to older Macs.
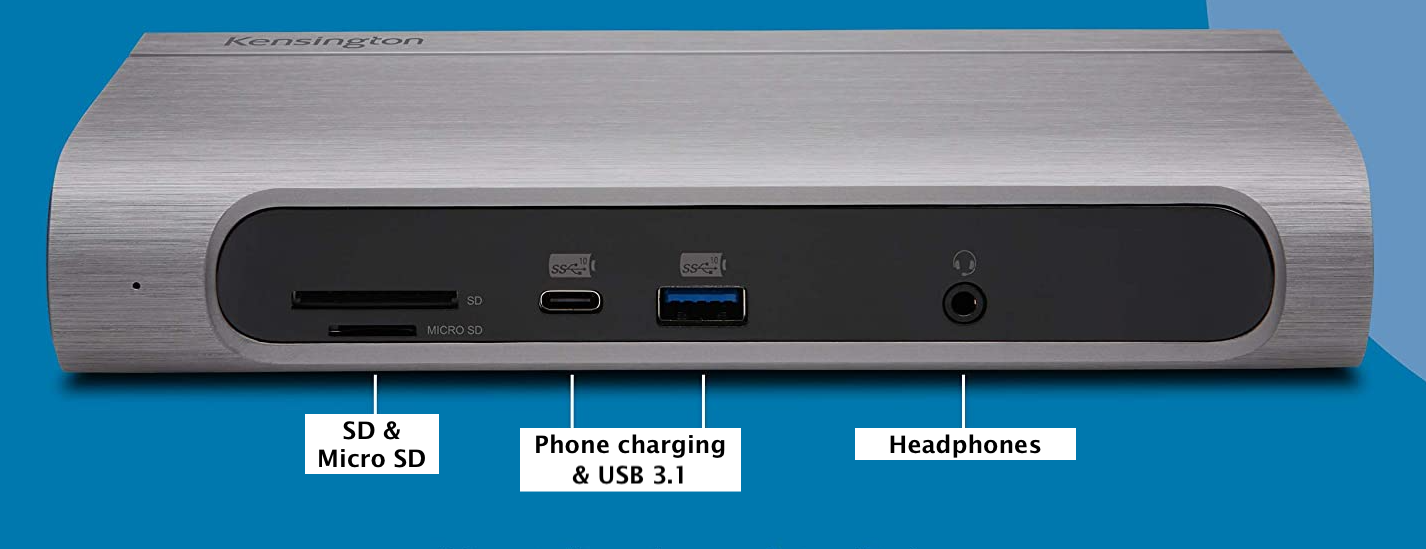 Front panel
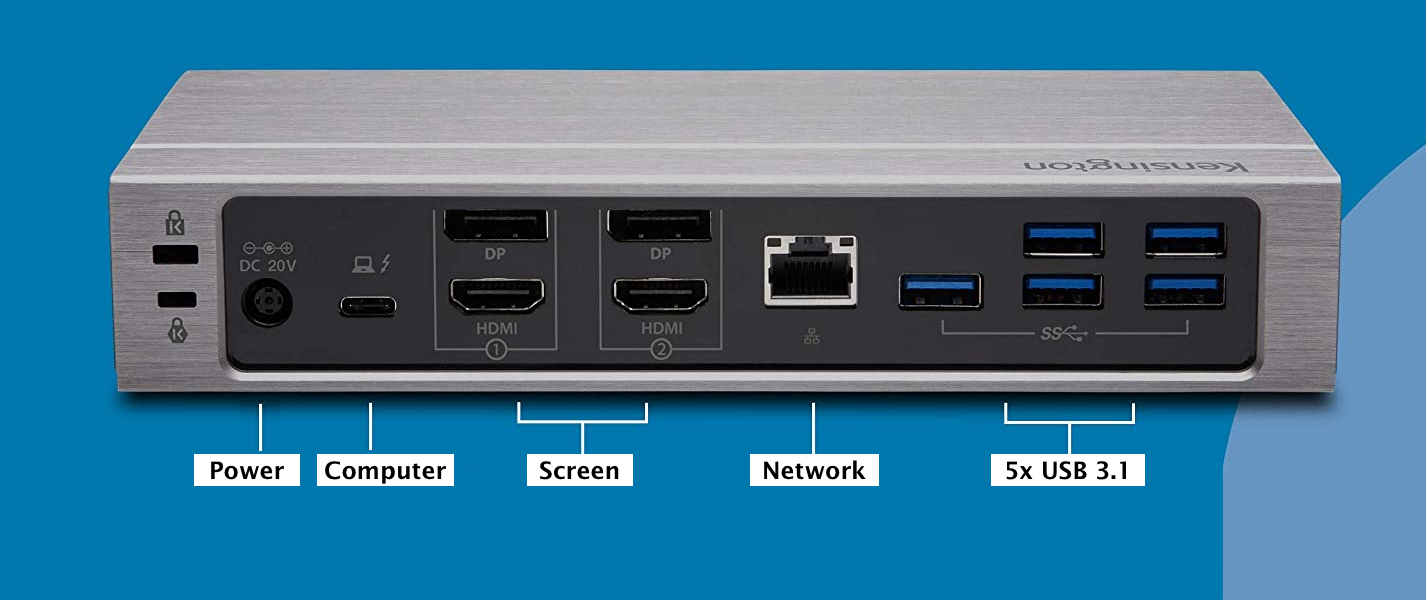 Back panel
Comments
0 comments
Article is closed for comments.